![]()
Moi
About Me
get in touch
older entries
newest entry
![]()
Archives
September 2006
August 2006
July 2006
June 2006
May 2006
March/April 2006
January/February 2006
November/December 2005
October 2005
September 2005
August 2005
July 2005
| www.flickr.com |
2006-12-04 * Mini Owl Tutorial
Specially for dear Anne, a little tutorial on making wee clay owls. Hope it is useful!
Materials:
polymer clay (i use sculpey) in navy, pale blue and white
1 head pin
jewelry pliers
oven
pyrex dish
*pre-heat oven to temperature stated on clay package*
1. Roll a small ball of navy blue(about the size of your thumbnail), a mini ball of white (the size of your pinkie nail), two teeny balls of white (the size of the tip of your pinky nail), two eensy weensy balls of navy (the size of a pinhead) and a pinch of pale blue (look at the photo for this)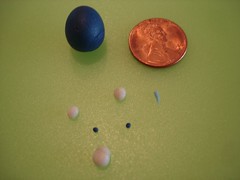
The penny is for scale
2. Shape the small ball of navy into an owl shape by making two pinches at the top for tufty "ears" and shaping the rest so that it is chubby at the bottom.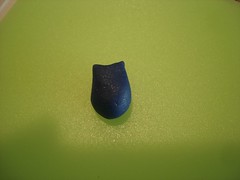
3. Squish the teeny balls of white clay until they are nice flat discs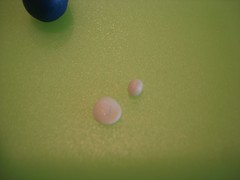
so you can see before and after squishing action
4. Place squished disks on the owl's "face" area, just below tufty ears, overlapping if you like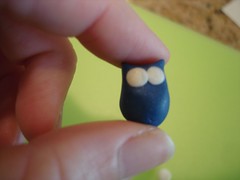
5. Place eensy weensy balls of navy blue on white disks, one at a time, as the irises of the owl's eyes. You can make your owl as cross-eyed or not as you like. Once they are in place, press gently to hold, no need to squish.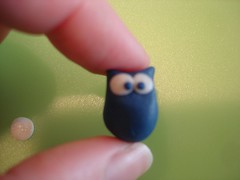
sorry the photo is blurry, but you get the idea
6. Now squish the last ball of white you have left until it is a tummy-sized flat round disk. Press it gently in place below the eyes, leaving a bit of navy showing between the eyes and tummy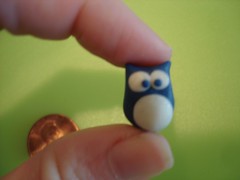
7. Carefully place the beaky bit of light blue so that it falls between the two eyes and points down at the belly, where it may overlap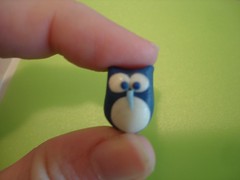
8.*Wings are optional!*Roll two more small balls of light blue (about the size you used for the tummy), squish them flat and then pinch each into a wing shape
9. Place one wing on each side of the body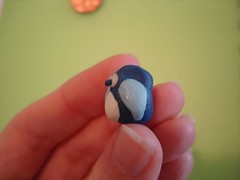
10. Add the head pin so you can make it hangy: run the head pin all the way through the body of the owl so that the "open" end of the pin is coming out between the "ears" and the head of the pin rests where the "feet" would be
this picture shows the middle of the process, at the end all of the remaining pin is poking out of the top of the owl's head
11. Bake on the pyrex plate according to the clay's instructions.
12. Once it has baked and cooled (definitely let it cool!), you can wrap the remaining head pin to make a loop at the top of the owl so you can string it on anything you like! It occurred to me they would also make cute stitch markers for knitters.
Let me know if you have any questions! And to be really inspired by tiny polymer clay creations, head over to Liquid Paper. Amazing!
Also, Pookie & Fig is such a cute, happy blog I discovered via Theo Design. It just makes me smile and I look forward to reading it every day from now on!
reading: oh, a terrible trashy novel i won't even tell you the title of
coveting: more time for owls!
Links

Getcrafty!
Adorn Magazine
Muse Sewing Workshops
SF Craft Mafia
Craftster
Friends
My Favorite Author
The Big Trip
Paper Tiger Knits
Shelly+Blankets=Awesome
Slate Blue
Toast 'n' Candy
von der heyde
West Coast Crafty
Daily Blogs
Loobylu
Wee World
Posie Gets Cozy
Yarnstorm
angry chicken
boy girl party
bara+design
Love Forever
inside a black apple
Coquette
disdressed
sunberst
bits and bobbins
Lemon Tree Tales
Penelope
Theo Design
Pookie&Fig
Wise Craft
Twelve22
Craft Log
Wee Wonderfuls
abby try again
little birds
thimble
not martha
shim and sons
buzzville
simple sparrow
needle book
inspire co.
Bella Dia
Bluepoppy
La Coquette
Shopping
My Etsy Shop
Crafty Planet!
Meg
Studiogems
Tiny Showcase
Hilarity
Miss Doxie
Crazy Aunt Purl
Otter
The Manolo
Pink is the New Blog